Table of contents
Take advantage of aurora forecasts
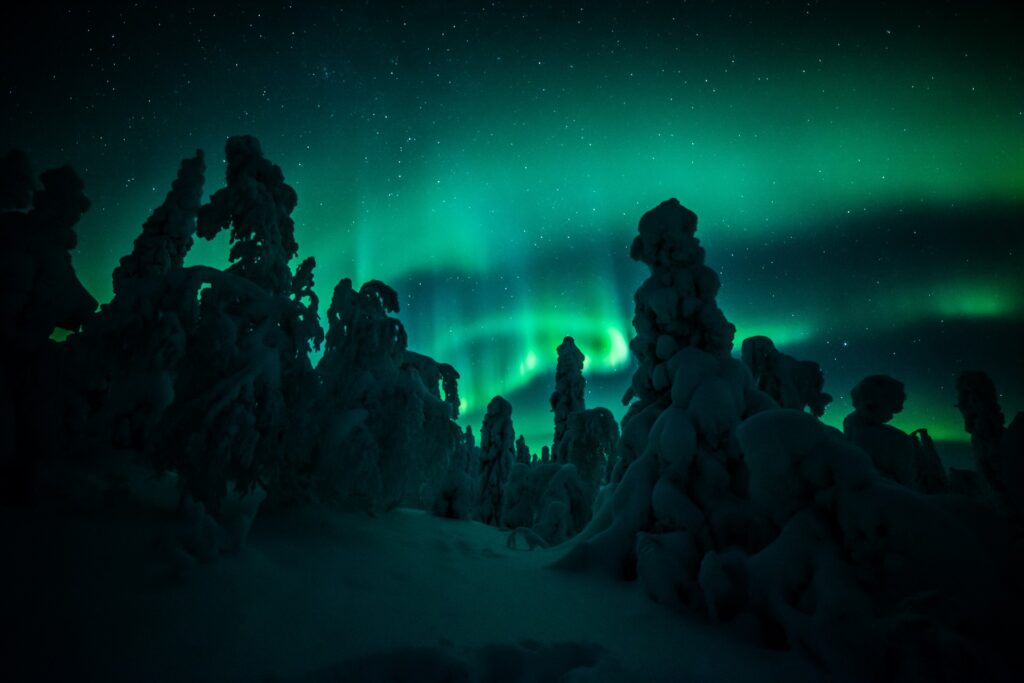
If you are interested in northern lights photography, the first handy thing to do is to track space weather through some external service. Although the whole winter season is a real potential time for northern lights photography, it is not advisable to leave in the cold during winter just to try your luck.
Of course, aurora borealis can also occur contrary to expectations, but the best chances of witnessing this light show are when the space weather is active.
Good places to follow in space are, for example, the Finnish Meteorological Institute’s space weather service and the Northern Lights photography groups on Facebook. For example Revontulikyttääjät-group is a good place to start.
Setup your camera in advance
When photographing northern lights, it is important to learn the camera’s features well in advance and, if possible, adjust the camera settings before shooting.
For example, if you plan to shoot northern lights in a specific location, you can manually adjust the lens focus during the day and use these settings later in the evening at dark.
Photography in winter is much easier and more comfortable if you don’t have to make bigger adjustments in frost and darkness.
Use proper photography equipment
Photography of northern lights is much easier if proper equipment is used in the hobby.
Even though modern smartphones can already capture at least reasonable footage, the minimum requirement for photographing northern lights could still be a high-quality camera body, a sturdy tripod, and a luminous and wide-angle camera lens. A minimum F-value 2.8 lens with a focal length of less than 30 is recommended.
It is also a good idea to reserve extra batteries for a winter photography trip if possible. Cold weather is bad to the camera’s battery, which, even when fully charged, may lose its charge instantly when exposed to below zero temperatures. Spare batteries can prove to be the salvation of a winter photography trip.
Don't forget the additional stuff
High-quality headlamp is also a convenient tool, which makes it easy to find the camera’s small buttons even in the cold.
Photographing northern lights is often a hobby for the ones with patience, in which case the importance of warm winter clothes and footwear, as well as well done layering. Your fingers are the most prone for freezing and that’s why I recommend good quality mittens for everyone visiting Lapland. The problem with gloves is that your fingers will be separated and this makes the areas prone for freezing way smaller. Inside a mitten, it is way easier to keep the “whole unit” warm as your whole hand is close together.
Choose the northern lights photography location in advance
You should look for the filming locations during daytime.
The further north you go, the better the chance of seeing the northern lights. This is despite the fact that in Finland, northern lights can even occur throughout the country. If you can see the stars on the sky, you should also be able to see the northern lights.
The brilliance of color usually appears in the sky between nine in the evening and midnight. During larger solar storms, the northern lights can be seen as early as five in the afternoon, and the light show can very well continue until the wee hours of the night.
Northern lights activity is usually at its best during the autumn and spring equinoxes, so it is possible to enjoy the best shooting moments with a spring hike or even during an autumn hike.
Use the self-timer of the camera or remote control
When photographing the northern lights, the camera must be kept as still as possible both at the time of shooting and during the shutter speed. Even if you trust the stability of your own hand, the best results are definitely achieved by using either the camera’s self-timer feature or a separate remote shutter release that allows the camera to take a picture without the need to touch the camera.
Try to capture auroras, even if you cannot see them
When doing Northern lights photography, it is a good idea to keep in mind that with long exposures, the camera can even see much better than a person’s own eye, and afterwards, you may find even shades of color in your own image that you haven’t noticed on the spot.
Green light is released from the molecule almost immediately, but the red charge stays in the molecule longer. Because of this, green light appears to form a variety of shapes and moving regular patterns, but red light may be just formless light.
For example, it has happened to me on a few occasions that the camera has even recorded clear images of northern lights that my own eye has not noticed.
Don't be afraid to try things out
Dare to try. As northern lights appear in the sky, you may want to try different shooting settings and angles. In addition, it is possible to edit images afterwards with various image editing programs. Of the free programs, for example, Gimp is quite good for editing northern lights images.
If you have lot of interest in editing your images afterwards, I would also recommend you to use RAW-format of images instead of regular JPEG. This will give you way more options when it comes to editing.
Enjoy the surrounding nature while filming the northern lights
Enjoy the surrounding nature. I already mentioned in paragraph four that photographing northern lights is a matter for the patient. It is often worthwhile to combine a long waiting period with enjoying nature.
So you should take with you, for example, fire making equipment, a bit of firewood and a hot drink, not forgetting a good and comfortable seat.
I would claim that there is nothing better than to sit at a bonfire in middle of nowhere, watch the beautiful starry sky, while looking forward to the dance of the northern lights in the northern sky.
Basic camera settings and photography equipment
- Shutter time: 15 seconds
- Lens aperture: as large as possible, preferably f / 1.4-2.8
- Focal length: as small as possible (e.g. 8 -18mm) because a widescreen lens is better for landscape photography.
- ISO sensitivity: 1600-4000
- Focus: use either manual focus on a specific point (such as a highly visible star or a landmark) or set the focus to infinity
- Use a self- or remote shutter release and a high-quality tripod.
Sources and about the subject elsewhere: Lapland.fi | Aurora hunter, how to photograph the northern lights Hurtigruten | 10 Northern lights photography tips for beginners Full Suitcase | How to photograph the norhern lights
